In order to manifest a delivery for a site you need to create a Site Delivery Route for it. This is done through the Site Delivery screen by allocating a route to a site and then allocating items to that route.
Creating a Site Delivery Route
From the home page, choose Sales
Choose the Site Delivery tab
Using the search window find and select the site you’d like to add a schedule to
Choose the Routes tab
Click Create Route
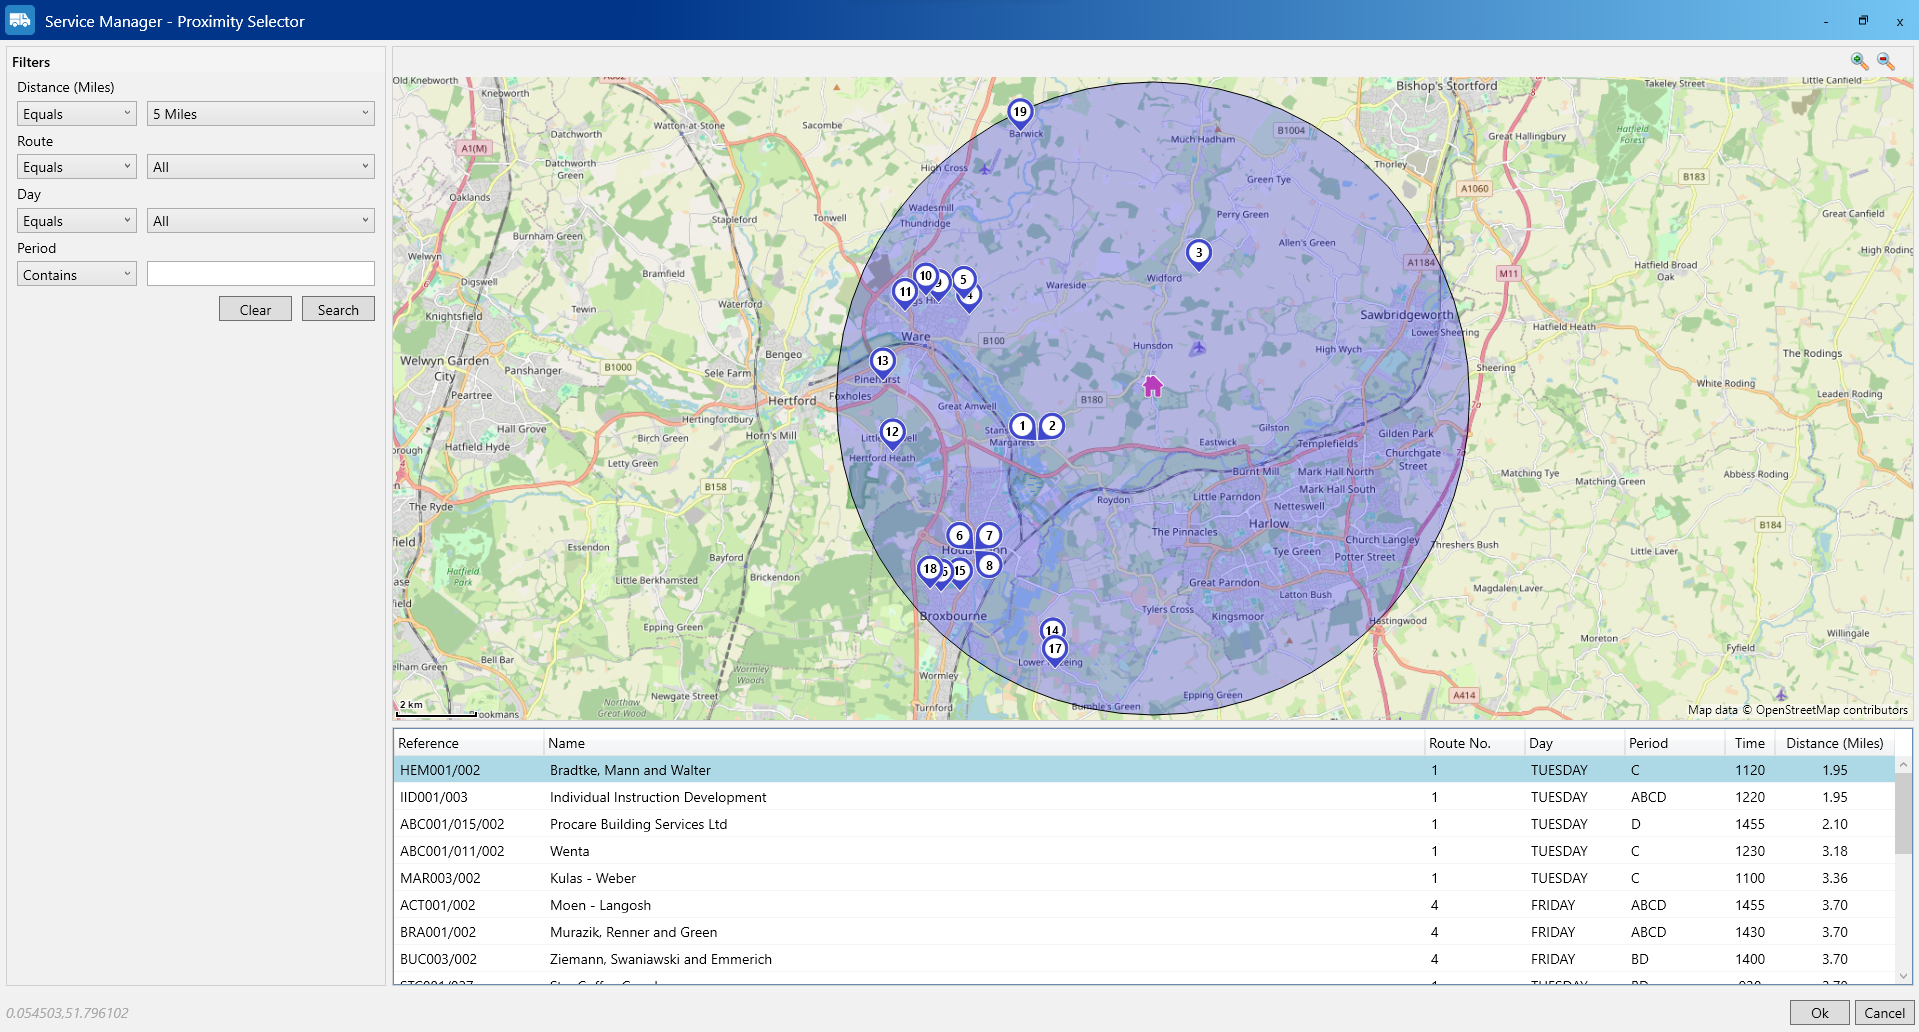
You can enter the details manually or click the map icon to open the proximity search and find a suitable route
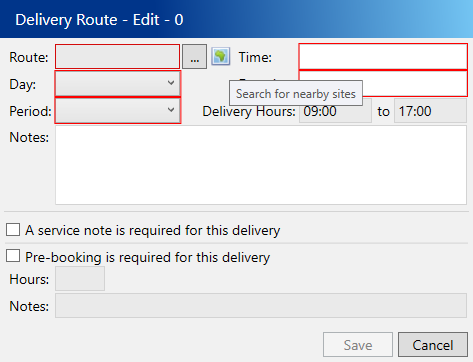
To enter the details manually:
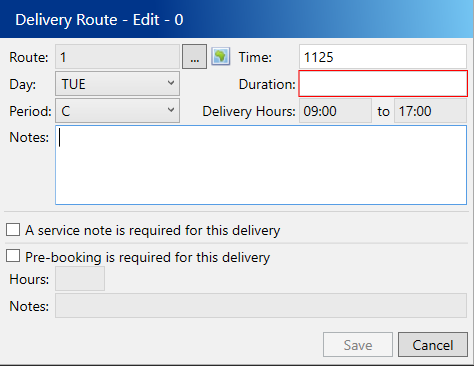
Select a delivery route
Select which day of the week you want to visit
Select a delivery period
The sequence on the day
Enter a duration in minutes that the driver will spend servicing the site
If you are required to give notice before servicing a site tick the Site requires pre-booking on this day box.
Choose Save
Your newly saved route will now appear in the Routes tab on Site Delivery ready to have items allocated to it, if this site has any Pending Agreements the route will also be available there.
Creating a Site Delivery Route from Pending Agreements
From the home page, choose Sales
Choose the Pending tab
Using the search window find and select the agreement you’d like to add a schedule to
Choose the Routes tab
Click Create Route
You can enter the details manually or click the map icon to open the proximity search and find a suitable route
To enter the details manually:
Select a delivery route
Select which day of the week you want to visit
Select a delivery period
The sequence on the day
Enter a duration in minutes that the driver will spend servicing the site
If you are required to give notice before servicing a site tick the Site requires pre-booking on this day box.
Choose Save
Your newly saved route will now appear in the Routes tab on Pending ready to have items allocated to it, the new route will also appear on the Site Delivery screen for this site.
Creating a Site Delivery Route from Route Admin
From the home page, choose Scheduling
Choose the Route Admin tab
Click New
Click the … button to search for and select the site that the job is for.
You can enter the details manually or click the map icon to open the proximity search and find a suitable route
To enter the details manually:
Select a delivery route
Select which day of the week you want to visit
Select a delivery period
The sequence on the day
Enter a duration in minutes that the driver will spend servicing the site
If you are required to give notice before servicing a site tick the Site requires pre-booking on this day box.
Choose Save
Your newly saved route will now appear in the Route Admin tab ready to have items allocated to it, the new route will also appear on the Site Delivery screen for this site.
Viewing existing deliveries near to a site
For a new site you want to make sure that you’re going to deliver to that site when you’re already nearby. By using the proximity search when creating your Site Delivery Route you can easily view nearby sites and when you’re scheduled to go there.
Start creating a new Site Delivery Route as described above
Click the map icon to open the proximity search window
You will be displayed a map and all sites within a 5-mile radius will be displayed by default. The search area on the left hand side of the window can be used to narrow the results. For example, if you have to go to the site on a Wednesday then you would only want to see sites being delivered to on a Wednesday
At the bottom of the window, the nearby sites and their schedule details are listed in a grid with the nearest site at the top.
In the grid select the site schedule that has an appropriate match, these will be copied to your new Site Delivery Route
Choose Ok
The schedule details that you selected will have been copied to your new Site Delivery Route, with the sequence set just after the one you selected in the window
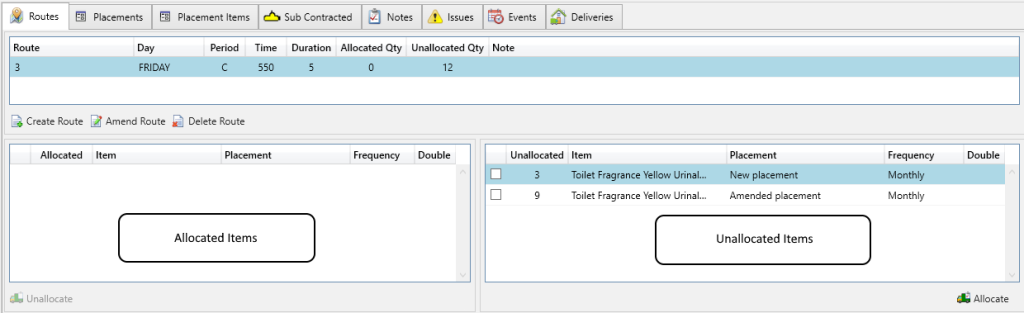
Allocating Items to a Site Delivery Route
Items can be allocated to routes from both the Site Delivery and Pending screens; the process is identical.
Under the Routes tab there are two grids, the left grid lists the Allocated items and the right grid lists the Unallocated items.
On either the Site Delivery or Pending screen, select the Routes tab
Select the Site Delivery Route that you want to allocate an item to
In the Unallocated Items grid, select the item(s) that you want to Allocate. You can select multiple at once
Click one of the items you have selected and drag/drop them over to the Allocated Items grid on the left. You can also press click the Allocate button on the toolbar
The item(s) will now move from being Unallocated on the right to Allocated on the left
To unallocate items, repeat the process but drag/drop the items from the Allocated Items grid over to the Unallocated Items grid; or use the Unallocate button on the toolbar once you have selected your items