An Invoice Run invoices active agreements up to a specified date. You can select specific agreements to include in each Invoice Run. For example, if your company operates multiple branches, you might prefer to conduct separate invoice runs for each branch.
Creating an Invoice Run
Navigate to the Invoice Run tab in the Invoices section.

Click the “New” button.
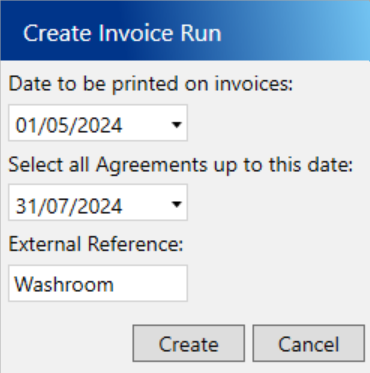
Enter the following compulsory fields:
- Date to be printed on invoices – This is the date that will be printed on the invoices generated on this Invoice Run.
- Select all Agreements up to this date – Active agreements with a next invoice date on or before this date will be included in this Invoice Run.
Click the Create button
Creating invoices on an Invoice Run
From the Invoice Run tab in the Invoices section, select the Invoice Run you want to create invoices for in the grid.
The “To Create” tab at the bottom of the screen will display all active agreements with a Next Invoice Date on or before the Invoice To Date of the Invoice Run.
Use the checkboxes on the left side of the grid to select the agreements for which you want to generate invoices. When you select an agreement, all agreements with the same account code will be automatically checked. To select all agreements in the grid, click the checkbox column header.
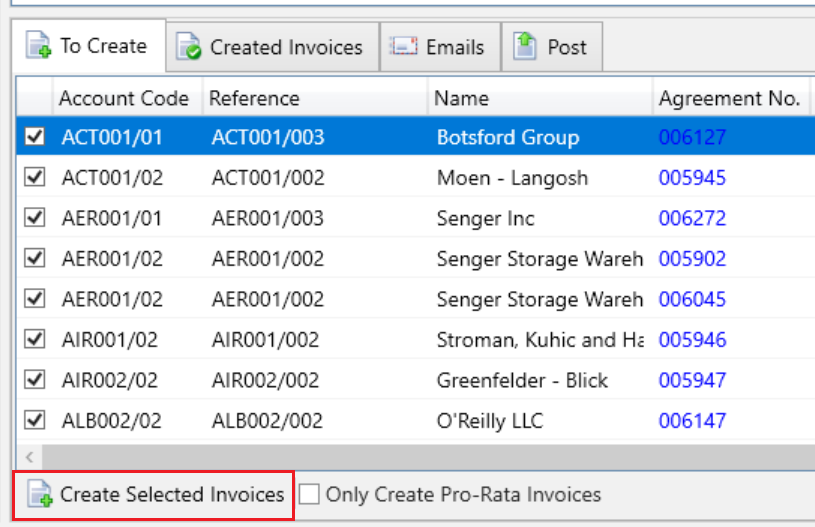
Once you have selected the agreements for which you want to generate invoices, click the “Create Selected Invoices” button at the bottom of the grid.
I just invoiced an agreement, why is it still in the To Create tab?
When you invoice an agreement, the Next Invoice Date is updated accordingly. For example, if an agreement billed monthly has a Next Invoice Date set to 1st May, after invoicing, the Next Invoice Date will be moved to 1st June.
This means that if an agreement is invoiced and the new Next Invoice Date still falls on or before the Invoice To Date of the Invoice Run, it will continue to appear in the “To Create” tab ready to be invoiced again on this Invoice Run.